14.9.14

Gorgeous Maple Walnut Scones

You know the feeling when you've just baked something and the aroma itself tells you that it's going to taste great? That was definitely the case with these scones. As soon as I pulled them out of the oven, oh my, was I greeted with the most warming, sweet and enticing aroma ever. It began as a homely and maple-y whiff and then came the fragrance of the beautifully toasted walnuts. That slight bitterness to cut through all the sweetness.

And that's exactly what they do in the taste of the scones as well. They're that extra crunch embedded in a beautiful maple crumbliness. These scones are so delicious, so tender and so crumbly, all without the addition of too much butter or sugar. Scones in general are also so great because they're so portable, create minimal mess and require no refrigeration or heating up.

These scones are perfect as they are and best served on the day they're made. They don't last more than a few days because they start losing they're crumbliness and flavor. They're made with lots of wholesome and natural ingredients and bound to make your home smell wonderful. I can't think of a reason not to make them, other than the fact that they'll be gone before you know it!

The final step of sprinkling them with granulated sugar just before baking takes them from baked good to an elegant treat you can serve at any gathering or tea party. Be sure to use good maple syrup for the true maple flavor, not that sweet, artificial "syrup" that's often served with waffles.

Ingredients
1 cup plain flour
3/4 cup whole wheat flour
1/4 cup baby oats
2 tsp baking powder
pinch of salt
4 tbsp cold butter, cut into small cubes
1/2 cup buttermilk
1 tsp vanilla
1/3 cup pure maple syrup
1/2 cup chopped walnuts
granulated sugar, for sprinkling

Instructions
Preheat oven to 200 C. Line a baking sheet with baking paper and set aside.

In a large bowl, mix together the flours, oats, baking powder and salt. Add the small chunks of cold butter (crucial that it's cold!) and mix again until the mixture has pea-sized crumbs. You could do this by beating on the lowest speed, with your hands, or even a fork. It's essential that you have some sizable chunks of butter still left, otherwise your scones will be heavy and dense, not rich and crumbly like you want them. Stir in the chopped walnuts.

In a separate bowl, whisk together the vanilla and maple syrup.

Add the wet ingredients to the dry and mix. Add the buttermilk in, tablespoon by tablespoon just until the dough just about holds together. Don't add more than necessary even if you haven't added the whole 1/2 cup amount. Conversely, add slightly more if you need.  But please please please don't overmix!

Use your hands to form the dough into a ball, then gently press down to create a circle of half inch thickness. Cut the round into 8 to 10 triangles (like a pizza), but don't fully separate the pieces. This keeps them from drying out completely!

Sprinkle the granulated sugar on top and bake for 20 minutes until tops are golden and crunchy.

Cool completely and serve. Enjoy!

8.9.14

A Lighter and Brighter Lemon Loaf

This summer has been a miracle. I'm not exaggerating or trying to make some weird joke. I mean it. You probably still have no idea what I'm talking about. Weather! Yup, all that fuss about weather. But it's not just any weather I'm talking about: it's London weather. The kind of weather people generally complain about being cold, grey and lifeless. And it is that (a lot of the time), but not right now! Since the end of April, until now, the skies have been a gorgeous blue and filled with lots of sunshine almost eighty percent of the time. That's something! Today (almost mid-September), I was out and about in a tank top and jean shorts. For the majority of the planet, that's totally normal in September. But not here in the UK. Last summer, by this time, I was already wearing a light fleece during the day time...
Now, although this may be a sign of (terrible) global warming, it makes me happy! I'm definitely a sun kind of girl! Which is why lemon-y treats and I get along! This lemon loaf is citrus-y, zingy, bright, tart, sweet and bursting with freshness and flavor! The loaf itself is light and lemon-y, but the glaze is what completes it. Unlike most of my recipes in which the glaze is pretty much optional, it's really not in this case. You'll need that little bit of sweetness and extra lemon flavor!


Because this loaf is made with buttermilk and coconut oil, it's perfectly moist, yet not heavy at all. It's not too sugary, but sweet enough to curb those sugar cravings. Best of all, it's definitely mood-lifting for the simple reason that it's lemon (and yummy!).

Ingredients
For the loaf:
1 3/4 cups plain flour
2 tsp baking powder
1/2 tsp salt
3/4 cup buttermilk
1/4 cup coconut oil, melted
1 egg
2 tbsp freshly squeezed lemon juice
4 tbsp freshly grated lemon zest
3/4 cup sugar

For the glaze:
1/2 cup powdered sugar
1-2 tbsp freshly squeezed lemon juice

Instructions
Preheat the oven to 175 C and line a loaf pan with baking paper and set aside.

In a large bowl, sift together flour, baking powder and salt.

In a separate medium bowl, beat together coconut oil, egg, and sugar. Add in lemon zest, lemon juice and buttermilk and beat lightly again.

Create a well in the dry ingredients and pour the wet ingredients into the dry, stirring until just combined.

Pour the batter into the prepared pan and bake for 45 minutes or until a toothpick inserted comes out clean.

Cool in the pan for 10 minutes, then transfer to a wire rack to cool completely.

For the glaze, combined powdered sugar and lemon juice until a glaze forms of desired consistency. Drizzle on top of completely cooled loaf. Make sure the loaf is cool, otherwise the glaze will be directly absorbed and won't set nicely on top.

Cut into slices and serve.

Enjoy the brightness and sunshine! 

6.9.14

Double Chocolate Almond Cookies

Chocolate is my best friend. No - second best. Ok, maybe not. I may be chocolate obsessed, but I haven't lost my mind... yet.

It seemed about time I bake some double chocolate cookies. Not only are there chocolate chips, but there's cocoa in the batter! These cookies are crisp on the outside and light and cake-y on the inside. Because there's not too much butter/oil, these aren't dense and fudgy cookies. What they are is delicious! Apart from the chocolate chips, these cookies are studded with chopped almonds, adding nuttiness and crunch. Pecans, walnuts, hazelnuts or even macadamia nuts would be delicious!

The #1 fan of these cookies was my darling sister, who is just as, if not more, obsessed with chocolate as I am (if that's even possible)! They satisfy every chocolate craving because they most definitely pack a chocolate-y punch, which is always a good thing! Am I right or am I right?

To bring out the almond flavor more, you could definitely use almond milk in place of the milk called in this recipe. Whether it's a chocolate fix you need, a sweet treat to perk up your afternoon, or a cookie calling, these are the cookies to make! Serve a big platter of these with a tall glass of milk, and trust me, all your worries will be long gone!
Ingredients
Makes 12 large cookies
1 1/4 cups flour
1 tsp baking powder
1/2 tsp salt
2/3 cup cocoa powder
3 tbsp coconut oil
1/2 cup unrefined sugar
2 tbsp soft brown sugar
1 tsp vanilla
1/3 cup + 1 tbsp milk of choice
1/3 cup chopped almonds
1/3 cup semi sweet chocolate chips

Instructions
Preheat the oven to 170 C and line a baking sheet with baking paper and set aside.

In a medium bowl, whisk together flour, salt, baking powder and cocoa.

In a separate bowl, beat sugars and coconut oil. Then add vanilla and milk and beat again until smooth.

Make a well in the dry ingredients and add the wet ingredients to the dry. Stir together until just combined. The dough should be thick. These are cookies you're making!

Fold in the chocolate chips and chopped almonds.

Spoon the batter onto the cookie sheet in 12 rounds, or as many cookies as you want the batter to make. Leave some gap in between the cookies as they spread slightly as they bake.

Bake the cookies for 12-15 minutes until outside is slightly crispy to the touch. Don't over bake otherwise the cookies will be too dry on the inside.

Let the cookies cool on the sheet for 5-10 minutes, then transfer to a wire rack to cool further.

In the meantime, grab one, break it in half, watch the strings of chocolate split, don't burn your tongue, and most of all, enjoy!

3.9.14

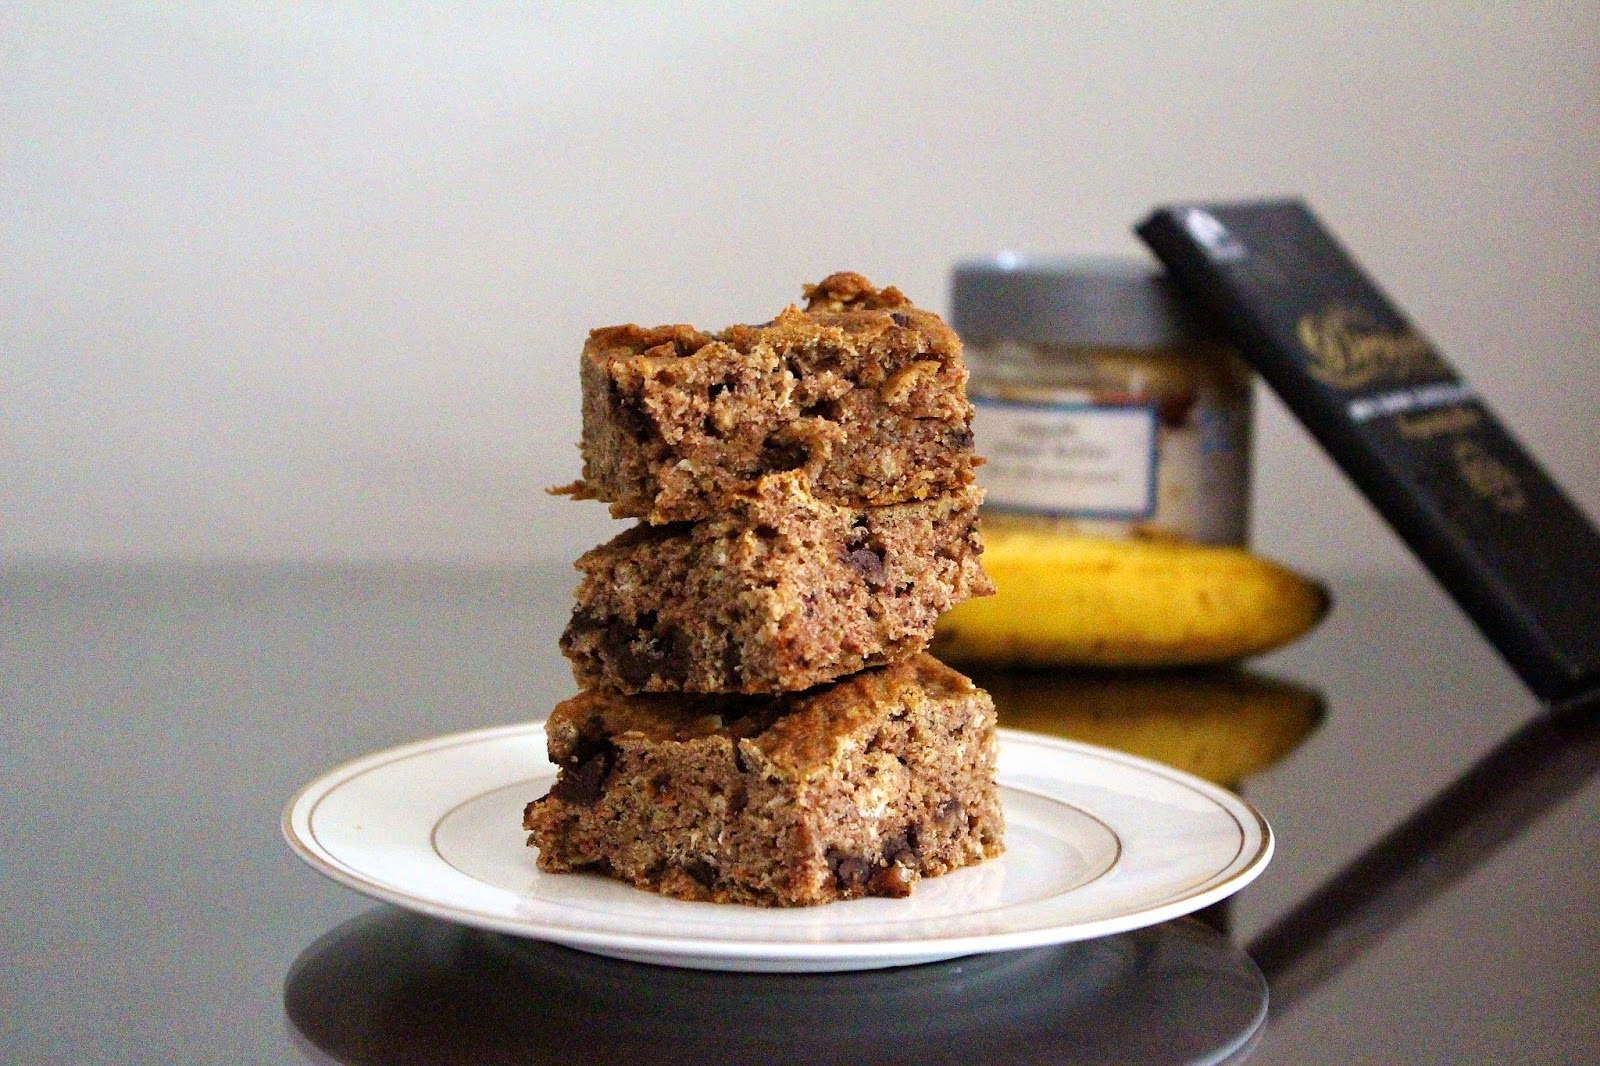
Soft Peanut Butter Banana Chocolate Chip Squares (Using Leftover Almond Pulp!)

Phew. Now, that was a mouthful, wasn't it? But a yummy one for sure! How can one go wrong with the classic peanut butter/banana/chocolate combination. It's a winner!

This is another one of my recipes using almond pulp leftover from this almond milk, and it is my favorite and definitely the most successful recipe to date! The struggle with using almond milk pulp is that it's moist, meaning any recipe has to be adjusted to account for the extra moisture being added in (I do realize how obvious this sounds!). I generally estimate half the amount of almond pulp I'm using to replace the flour and the other half to replace some sort of liquid. I tend to look for recipes that call for milk as it's the easiest wet ingredient to replace with the wet almond pulp.


The almond pulp has so much nutrition from all the bits of almond and specks of date, so please don't ever consider throwing it out! Other success I've had includes mixing it into pancake batter. Trust me, I don't know how and why, but it works so well!

Anyways, these soft PB-banana-choc squares have a certain fudginess to them that makes them oh-so-delicious. None of the three main flavor ingredients steal the spotlight, and the resulting combination is perfectly balances. These bars are perfectly sweet, taste good warm or cold straight out of the fridge, can be eaten anytime of day and are just yummy! To top it all off, they're made with a wide range of healthy ingredients and have minimal sugar and added fat (ie. oil/butter).

Ingredients
1/3 cup unrefined sugar
1/2 cup creamy peanut butter
1 ripe banana, mashed
1 tsp vanilla
1 cup almond pulp
1/2 cup whole wheat flour
1/2 cup plain flour
1/2 cup rolled oats
1 tsp baking soda
pinch of salt
1/3 cup milk
1/3 cup semi-sweet chocolate chips

Instructions
Preheat oven to 170 C. Line a square baking dish with parchment paper and set aside.

Beat the sugar and peanut butter together until light and fluffy. Add in the mashed banana and vanilla and beat again. Stir in the almond pulp.

In another bowl, stir together the whole wheat flour, plain flour, oats, salt and baking soda.

Add the dry ingredients into the peanut butter mixture and mix to combine. The mixture will be stiff and clumpy at this point, so don't worry, because you're doing it right!

Slowly add in the milk in parts until a dough forms. If your dough seems to be getting quite thin, don't add all the milk called for in the recipe.

Fold in the chocolate chips.

Pour the batter into the prepared baking dish and bake for 20-25 minutes or until a toothpick inserted comes out clean.

Cut into squares and serve! Or just cut out a chunk, grab a glass of cold milk and savor the good life.

Enjoy!